SwiftUI #Previews and Prefire: Easy Snapshot Tests!
If you're an iOS engineer, you probably are already using SwiftUI #Previews as part of your development.
What you might not realize is that you essentially have been writing Snapshot Tests! You've been writing "tests" without really taking full advantage of them. You're already putting this effort into writing these Previews, why not take it one step further?
What are Snapshot Tests?
Snapshot tests take a snapshot (screenshot) of your UI. If the screenshot changes, then the test fails (but more on that later). It lets you quickly see which parts of the app are affected by your Pull Requests, which increases confidence in sharing code, and also increases your code coverage.
If you're doing AI-assisted coding, it also makes it much easier to make UI changes without having to manually test changes.
The most popular snapshot testing library on iOS is the fantastic swift-snapshot-testing from Pointfree.
However, using this library typically means you have to manually write each snapshot test. Surely we can do better.
How do I convert my #Previews to Snapshot Tests?
There are a few libraries to do this. You could use Doordash's library to achieve this. However, it does not work with the #Preview macro, and so you won't magically get snapshot tests from your existing previews.
On the other hand, Prefire is a library and build plugin that does this for you magically. At build time it generates snapshot tests from your Previews, so you don't have to rewrite your existing Previews.
It also uses swift-snapshot-testing under the hood, so you get the high quality, well tested snapshot tests that Pointfree gives us.
In this tutorial, we'll show you how to use Prefire.
But wait, will this be noisy?
You probably have hundreds or thousands of existing Previews, it's very likely that some of them aren't suitable for snapshot tests and are going to be flaky. In this tutorial we'll also use Screenshotbot to handle storage of screenshots. In particular this means while you're trying this out tests will not fail on Pull Requests and developers won't be blocked. Once you're happy with the stability of the tests, you can enable it on PRs.
Give me step by step instructions!
Alright here it goes! As we work through this, we also have a working example at: https://github.com/screenshotbot/prefire-example, so feel free to look at that repo if something here is confusing.
Step 1: Make sure your __Snapshots__ directory is not commited
Before we continue, we will be generating some PNG files in our repository and we want to make sure it doesn't accidentally get committed. So let's add this to your .gitignore. If you already have snapshot tests, skip this step and just be careful not to accidentally commit the screenshots.
**/__Snapshots__/**/*.pngStep 2: Add swift-snapshot-testing dependency
If you don't already use swift-snapshot-testing, add this dependency: https://github.com/tdrhq/swift-snapshot-testing (version 1.18.6-sb at time of writing).
Notice that this is a fork of pointfreeco/swift-snapshot-testing. This fork is a bit more lenient when screenshots change. If we used the original library, then the moment we add snapshot tests, any flakiness would cause the build to fail. Using this fork will let us integrate with Screenshotbot later to make for a smoother migration.
Step 3: Add Prefire
Add this dependency: https://github.com/BarredEwe/Prefire.git (at time of writing we used version 5.1.0)
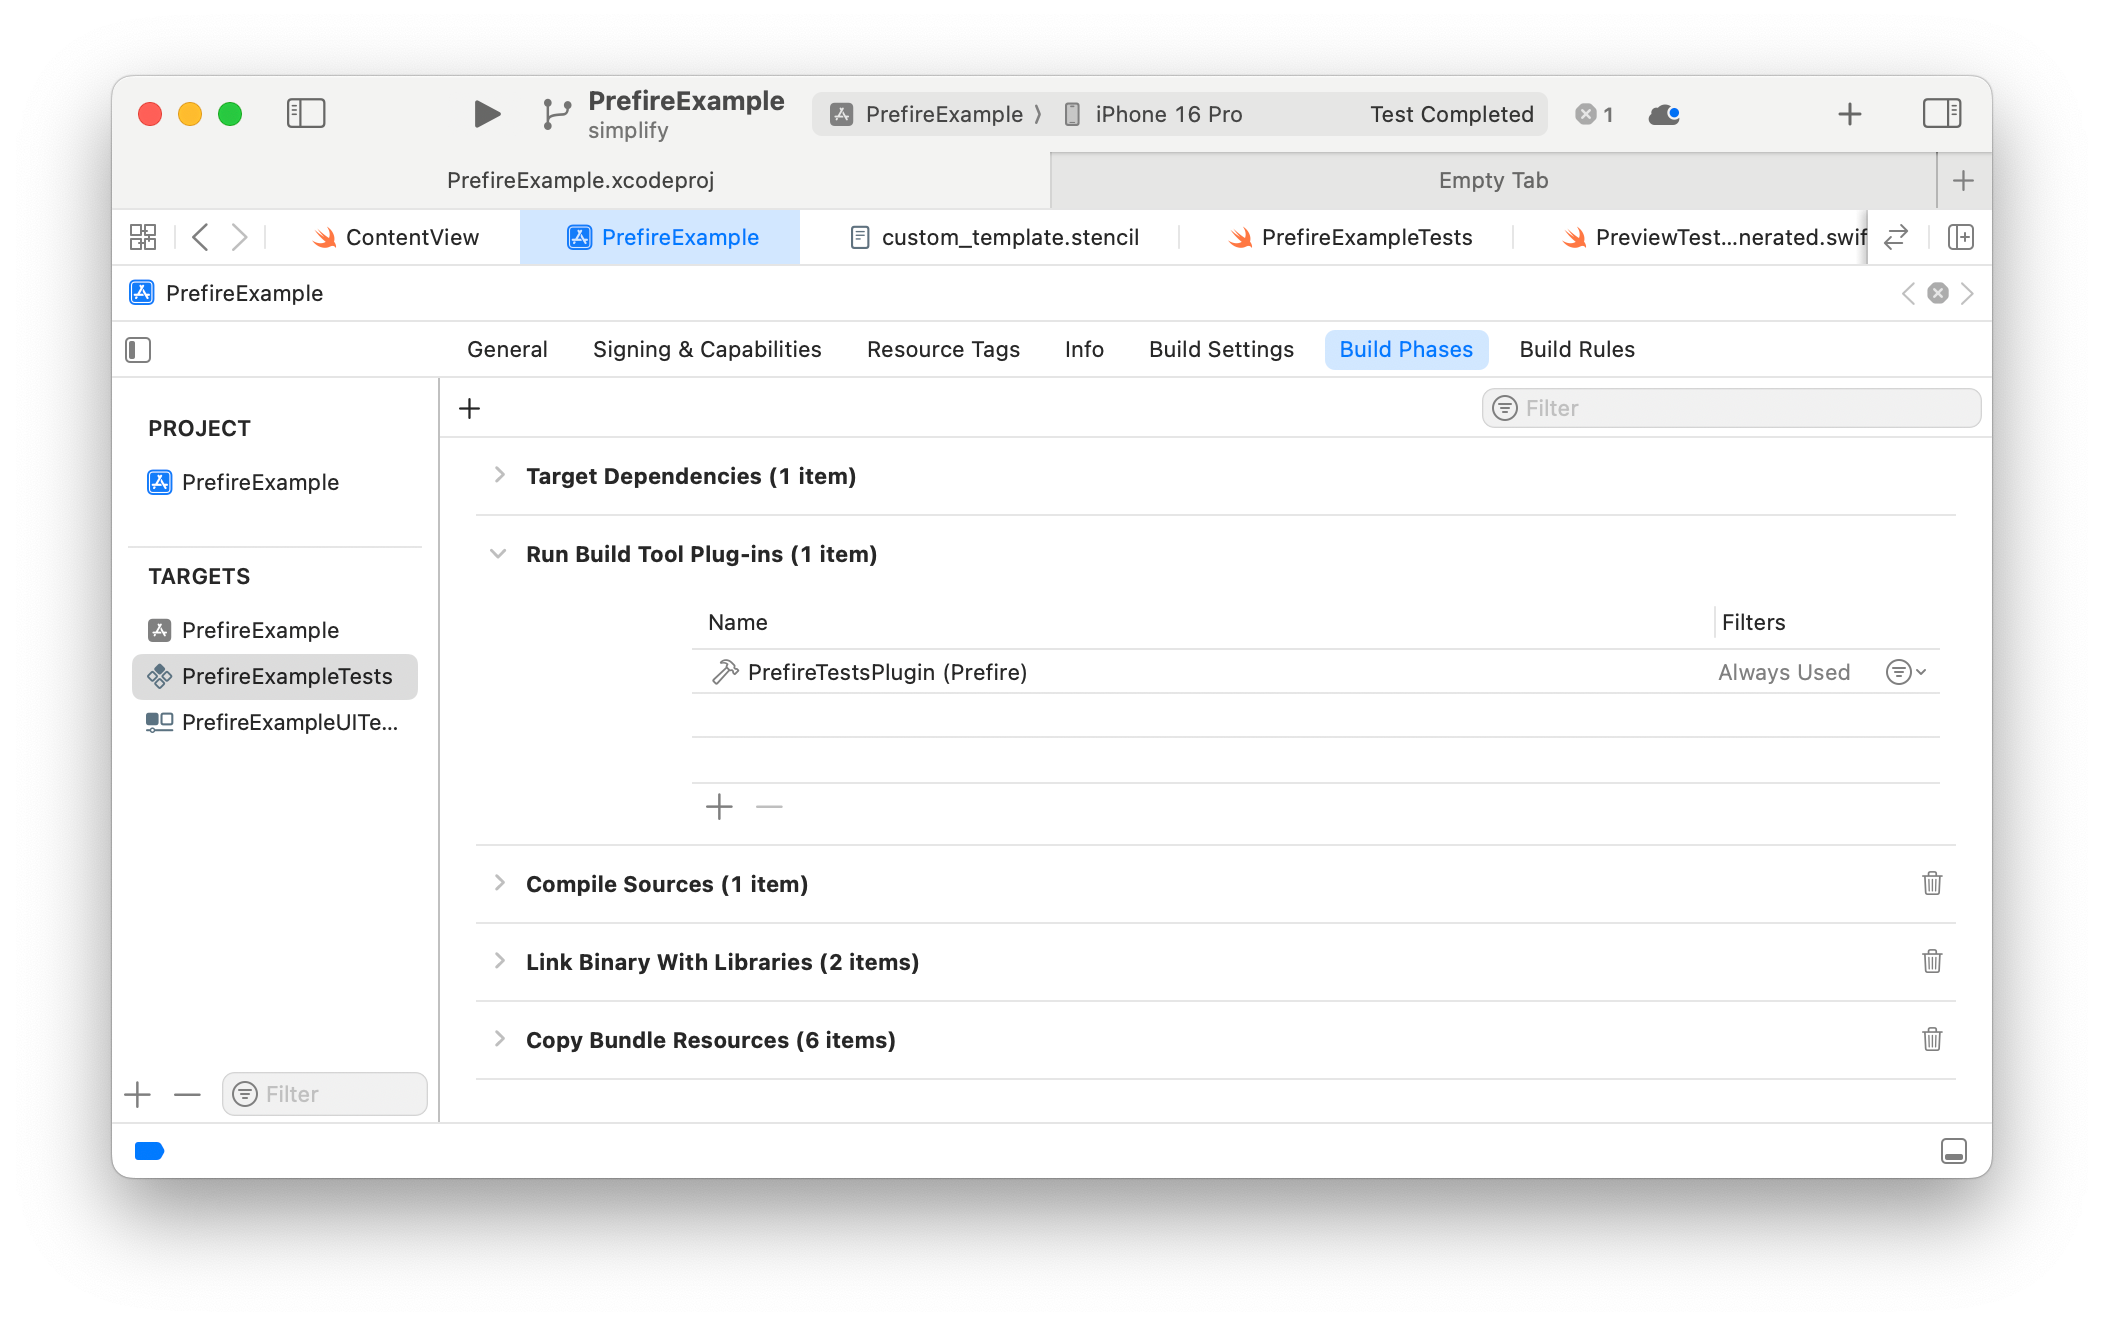
Add PrefireTestsPlugin as a build tool plugin to your test target.

Step 4: Configure Prefire
Technically, at this point you already have snapshot tests. You can test it out by running your tests. The tests should fail because the snapshots do not exist. If you run it a second time, the tests pass.
But we don't want this behavior, we want the tests to always pass. We don't want to store the screenshots in the repository, because that would be expensive. We don't want builds to fail if any of the screenshots are noisy.
Let's configure Prefire to make this happen.
First add a .prefire.yml file with this content:
test_configuration:
    template_file_path: custom_template.stencil
Now let's create that custom_template.stencil file. For context: Prefire lets you configure what you want to do with the Previews. This template is exactly how we do that.
I've taken the default Stecil template from Prefire and modified it a bit. You can see the latest version here: https://github.com/screenshotbot/prefire-example/blob/main/PrefireExampleTests/custom_template.stencil. Copy this file into MyAppTests/custom_template.stencil. (The modification is to not XCTFail when the images aren't present.)
At this point you're mostly set! Run your tests locally to make sure it's all passing. It should generate the PNG files, but it should never fail even when the PNG files are not present or even if the PNGs change.
Go ahead and merge these changes. You'll not get any notifications when screenshots change, but you'll still get the coverage from this code running.
Step 5: Upload screenshots to Screenshotbot and monitor them
Let's upload the generated screenshots to Screenshotbot. First, create an account on Screenshotbot, and then create an API key. Copy these environment variables into the CI environment that you're using. (Your CI framework should have a way of setting environment variables or secrets.)
Now add an extra step to your CI job:
# Install the CLI tools for Screenshotbot
curl https://cdn.screenshotbot.io/recorder.sh | sh

# Upload the screenshots, fix the directory
~/screenshotbot/recorder --directory MyAppTests/__Snapshots__ \
   --recursive \
   --channel MyAppTests
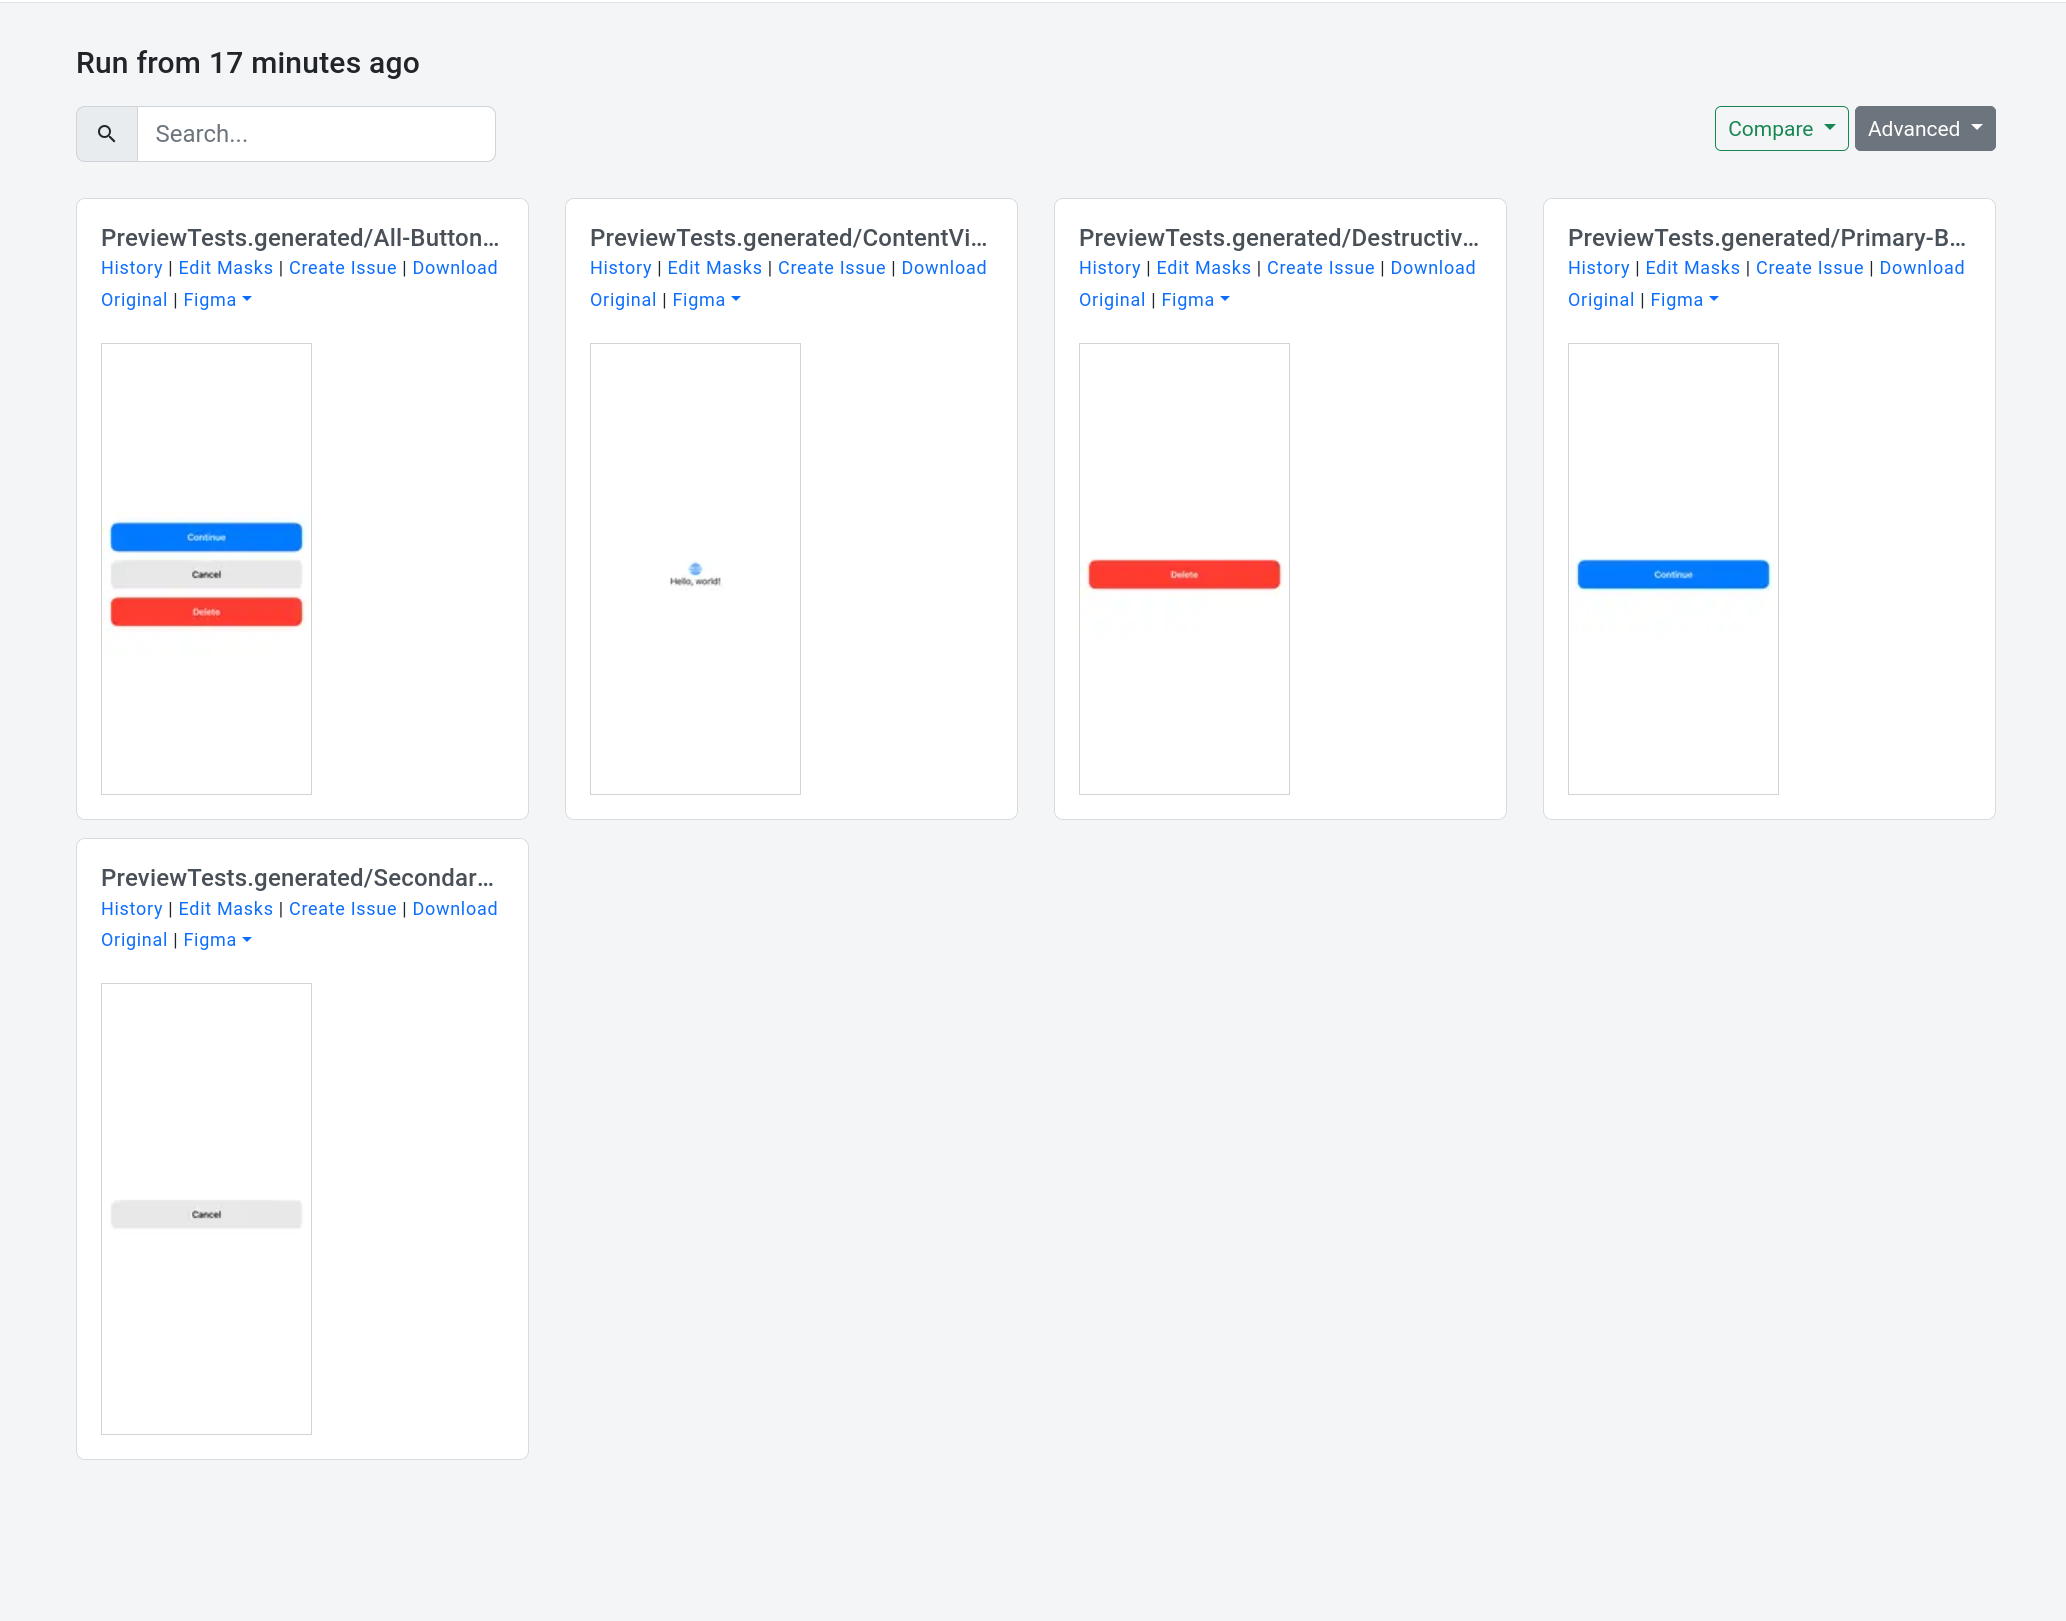
Trigger a PR for these changes. Once the build completes you should see all the screenshots uploaded at https://screenshotbot.io/runs. At this point, we haven't set up Pull Request notifications, so you won't see any notification on your PR itself.
Here's the screenshots from the PrefireExample project:

If you've got this far, merge your PR!
Step 6: Set up Slack or Email notifications and watch for flakiness
If you are a small team or have a small number of snapshots you can skip this step and jump directly to Step 7. But if you're a large team trying to reduce noise, turn on Slack or Email notifications in Screenshotbot. Each time somebody merges a UI change on the main branch, Screenshotbot will send you a notification. It does not block developers, so it's a good way to test the stability.
If any previews are being unstable, you have a few options:
- Disable the Preview completely using Prefire's
.prefireIgnored()option - Use Screenshotbot's Masking tool to mask out any animations or timestamps that might be unstable
- Fix any timestamps or animations in the Previews themselves
- Or if some minor flakiness is showing up (i.e. few pixels off), you could use
--pixel-threshold 1with Screenshotbot. It's not recommended to use this unless you absolutely require it.
Step 7: Enable it on PRs!
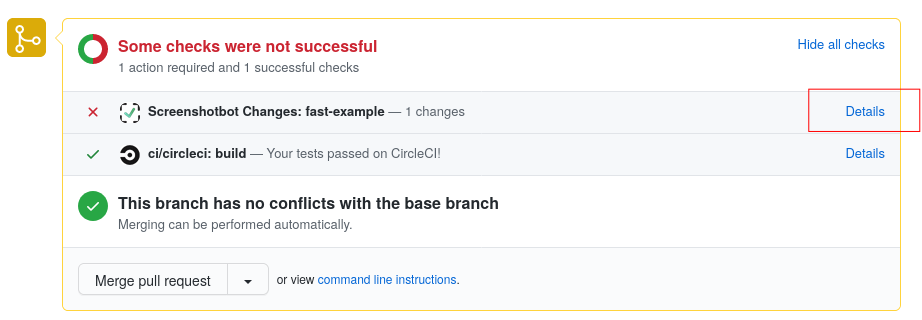
Once you're happy with the stability of the tests, use Screenshotbot to enable it on your Pull Requests. The instructions are a bit different based on where you host your code, here's the instructions for a few supported platforms
At this point, each time a developer makes a change that affects a Preview, they'll get notified on the PR. They can just go ahead and Accept the changes in Screenshotbot, the build turns green and will unblock them.

Scale up your snapshot tests!
Now that you have a large suite of snapshot tests, don't be shy! Add more flavors (dark-mode/light-mode, translations, iPad/iPhone), Screenshotbot is really good at scaling up to tens of thousands of screenshots.
Try asking your favorite Coding Agent to make a UI change, and magically see what the changes look like on your PR. Also try asking your Coding Agent to write your Previews for you!
Do send me an email if you think this improves your Developer Experience! You can find me at arnold@screenshotbot.io.
Did you enjoy this post? Share the knowledge!
